FPV Equipment
Batteries and Chargers
Props
Tools
Minor Enhancements
Software and Setup
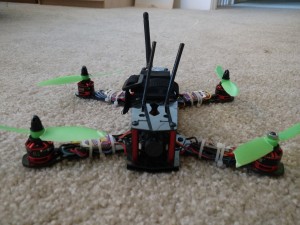
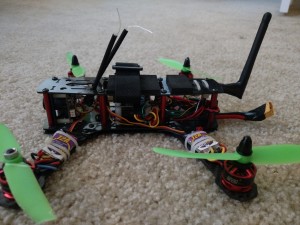
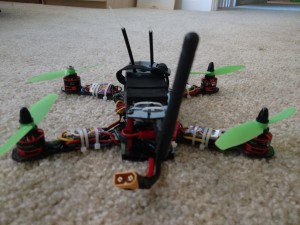
I have now been flying the quad I built in my first blog post regularly for over 6 months and have received many requests to share what I would have done differently. There isn’t too much I would have done differently, but I have made some upgrades that you may want to consider regardless if you’re just starting or have already finished your first build.
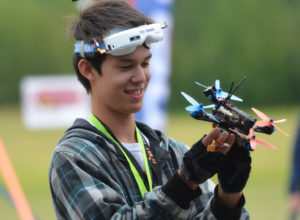
Goggles – Quanum V2s
http://www.hobbyking.com/hobbyking/store/__78125__Quanum_DIY_FPV_Goggle_V2_w_5_inch_LCD_Monitor_Kit_.html
Easily worth the extra $30 to upgrade. Better screen and better form factor. I wish I would have got the V2s to start with.
FPV Receiver – FR632
http://www.banggood.com/Boscam-FR632-Diversity-5_8GHz-32CH-Auto-Scan-LCD-AV-Receiver-p-958097.html
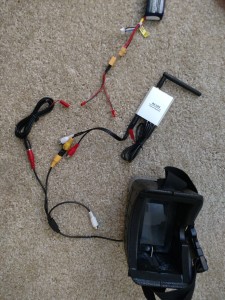
This improves the video quality and allows for using two different types of antennas. Basically it picks the better of the two receptions to give you a clearer video. It’s a costly upgrade and it’s a little big, but you can fit it in the Quanum V2 pouch and it does improve video quality. A good upgrade, but not a must have.
FPV Receiver Antenna #1 – Mad Mushroom
http://www.getfpv.com/ibcrazy-5-8-ghz-mad-mushroom-antenna.html
Improves video quality and range. I love this antenna and would highly recommend it. Since you get the stock antennas with the FPV transmitter and receiver this upgrade is easy to hold off on to save money at first.
FPV Receiver Antenna #2 – Crosshair
http://www.getfpv.com/ibcrazy-5-8ghz-10dbic-crosshair-antenna-rhcp.html
This antenna only makes sense to get if you have a diversity FPV receiver (such as the FR632). It significantly increases the range the quad can go and maintain video signal, but only in the direction the antenna is pointed. With only one of these antennas it doesn’t make sense, but with a diversity FPV receiver it picks the best of the two signals so you can have one antenna (such as the Mad Mushroom) that covers all around you and the crosshair antenna will allow you to fly out far in one specific direction.
FPV Transmitter Antenna – Aomway Leaf Clover
http://www.banggood.com/Aomway-5_8GHz-FPV-4-Leaf-Clover-AV-Transmission-RHCP-Antenna-1-Pair-p-961730.html
Strong antenna that also works well. Barely noticeable improvement in video quality and range. Since you already get the stock antennas with the FPV transmitter this is another upgrade that is easy to hold off on to save money at first. This is the best antenna that’s under $20.
Battery Charger – iMAX B6
http://www.hobbyking.com/hobbyking/store/__36905__IMAX_B6_50W_5A_Charger_Discharger_1_6_Cells_GENUINE_US_Warehouse_.html
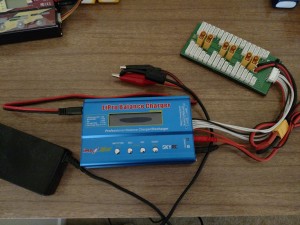
The battery charger I linked in the original post works great, but it does not have discharge or storage mode options. This forced me to always discharge the batteries by flying and manually stop the charge between 3.7-3.85V per cell when I wasn’t planning on using the battery for a while. It also didn’t have a 6s jst plug which means finding a compatible parallel charging board will be more difficult, but it probably won’t be too difficult to modify a parallel charging board or make an adapter from 6s jst to 4s. The iMAX B6 charger makes it so much easier to get your batteries to the correct storage voltage which is great if you don’t know when the next time you’ll be flying is. The downside is you also have to get a power supply for this charger. The power supply needs to provide anywhere from 11~18v, at least 5A (you could go lower, but it will affect the max amps/speed you can charge at) like this one, but you should easily be able to find an old laptop power supply at a thrift store for a couple bucks that will work just as good. If you can only find a power supply with the right specs, but not the correct round plug for the charger, you can cut off the plug and solder on any connection that works with the alligator clips since the charges comes with a plug attached to alligator clips. Note: like the P405 charger you need to buy a connector for XT60 or make one yourself. Here’s a great video about the iMAX B6 charger: https://youtu.be/w8ijfcjU-rc
Although I don’t have personal experience with it, you could get this version that has a built in power supply and includes an XT60 connector: http://www.hobbyking.com/hobbyking/store/__58285__IMAX_B6AC_V2_Professional_Balance_Charger_Discharger.html
Parallel Charging Board
http://www.hobbyking.com/hobbyking/store/__36907__HobbyKing_Parallel_charging_Board_for_6_packs_2_6S_XT_60_US_Warehouse_.html
Awesome upgrade. Allows for charging up to 6 batteries in the same amount of time as it used to take to charge just one. Note: as mentioned above this board will not work out of the box with the P405 charger, but will with the iMAX B6 charger. Here’s a great tutorial on parallel charging: https://www.youtube.com/watch?v=7wj-EB4-71M and here’s a quick overview on how to do it with the iMAX B6: https://youtu.be/w8ijfcjU-rc?t=18m22s
4s Batteries – Zippy 1300mAh 4S 40C
http://www.amazon.com/gp/product/B00TDCDK58
Upgrading from 3s to 4s batteries is the easiest way to make your quad faster. I wouldn’t recommend beginners starting with 4s, but when you’re ready, it’s a great upgrade. I still haven’t tried a lot of different 4s batteries, but I know I like the lighter (lower mAh) ones with at least a 35C rating.
If you followed my first blog post after Feb 1, 2016 the quad will be able to handle 3s and 4s batteries. If you followed my blog post before then, the only thing that you need to do is replace the SC2000 600TVL Camera with the RunCam 600TVL 5-17V Camera
 and you should be good to go.
-The ESCs are rated for 2-4s.
-The motors are only rated for 2-3s, but after doing a good amount of research (see http://blog.oscarliang.net/3s-4s-setup-mini-quadcopter and http://www.rcgroups.com/forums/showthread.php?t=2180080) it appears the motors are fine handling 4s on 5040 props. I tried it out myself and the motors worked great with 4s.
-The FPV transmitter handles 7V-24V, so no problems there.
-Last of all since the flight controller and receiver
  get powered off the ESCs, there’s no problem there either.
3S Batteries – Turnigy nano-tech 1300mAh 3S 45-90C
http://www.hobbyking.com/hobbyking/store/__18207__Turnigy_nano_tech_1300mAh_3S_45_90C_Lipo_Pack.html
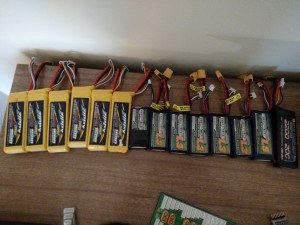
After trying several different 3s batteries I found I really liked the first ones I got best. So the upgrade isn’t to get a new battery, it’s just to get more batteries, which can happen at anytime your budget allows. I got 6 of them and that’s a good number for me. With my parallel charging board I can charge 6 at a time in 1-2 hours which is usually perfect. 6 batteries lasts 40-45 minutes (7 minutes per battery) of flying time which equals 1-2 hours of field time depending on how often I crash and how long I take in between batteries. If you wanted to fly continuously you would probably want 12 batteries, so 6 could be charging while you flew the other 6.
-I tried a 2200 mAh battery and a 1500 mAh battery and just didn’t like the weight they added. Both made the quad feel more sluggish and only offered a few extra minutes of flying time.
-I also tried a Turnigy nano-tech 1300mAh 3S 25-50C battery and it worked OK for casual flying, but did not allow for long periods of fast flying.
Props – DAL 5045 Bullnose
http://www.surveilzone.com/Dalprop-2-Pairs-5045-CWCCW-Bullnose-Props-for-Mini-200-RC250280-QAV250-FPV-Racing–g-1421
or
http://www.amazon.com/gp/product/B017UPFTSK
After breaking tons of Gemfan 5040 props I was surprised at how strong these ones were. Note: I would still recommend using Gemfan props for learning since they will cause less stress on your motors when you crash.
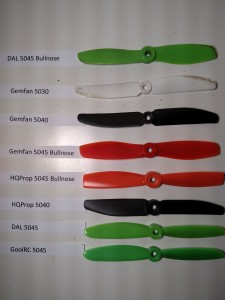
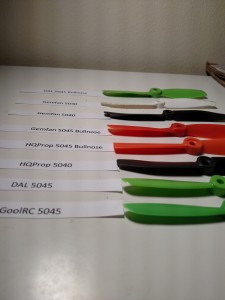
I tried the following props:
–Gemfan 5030 – great for learning, because they reduce the power of the quad (compared to a higher pitch like 5040 or 5045) and break easily instead of damaging the motors.
–Gemfan 5040 – good cheap prop, but breaks easily. I would still recommend this as a great prop to start with.
–Gemfan 5045 Bullnose – good, but more expensive than and not as strong as DAL Props.
–HQProp 5045 Bullnose – great and strong, I highly recommend them, very comparable to DAL 5045 Bullnose, but more expensive and harder to find.
–HQProp 5040 – very comparable to Gemfan 5040, but more expensive and harder to find.
–DAL 5045 – great and fairly strong, but I like the bullnose version better.
–GoolRC 5045 – worked OK, comparable to DAL 5045.
Motor Caps – Lock Nuts
http://www.amazon.com/gp/product/B014ISN4VG
or
http://www.myrcmart.com/hex-flange-m5-low-profile-slipresistant-aluminium-black-cw-height-45mm-10pcs-p-9306.html
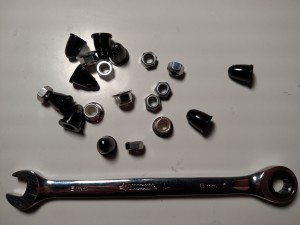
The motor caps that come with the motors don’t work well. I lost one after only a couple flights. At first I tried to find a replacement cap, but they were expensive and it turns out normal 5M lock nuts work better. The first link works great with the Gemfan props and they work OK with DAL Props, but you may want to consider getting the low profile ones in the second link if you plan on using DAL Props.
8mm Wrench
http://www.amazon.com/gp/product/B00K3JVLVA
Once you switch to lock nuts you will want a good tool for putting them on and taking them off.
Multimeter
http://www.amazon.com/gp/product/B000EVYGZA
This isn’t the multi-meter I got, but having one makes this so much easier. It’s not required, but it sure helps when trying to figure why something is not working.
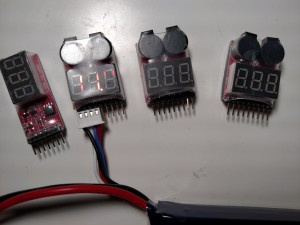
Lipo Battery Tester Monitor Low Voltage Buzzer
http://www.amazon.com/gp/product/B00SCJIVLQ
I added this as an optional item in my first blog post since it is so useful. This will make it easy to check the voltage of your battery and individual cells without connecting it to the charger. Also, if don’t set up telemetry you can mount this to your quad so you have a battery warning buzzer to help you avoid damaging your lipo batteries by running them too low. Incredibly helpful to have as a small tool. If you want a silent battery tester as well for use at home consider getting this: http://www.amazon.com/gp/product/B0081Y6QC8
Feet – Nerf Balls
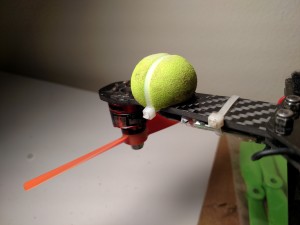
http://www.amazon.com/gp/product/B0013BA028
The carbon feet broke off the quad after the first week of flying and it’s not essential to have them, but they do help save the frame from extra stress when landing. After a month of use without feet I saw a pack of nurf balls I had bought awhile ago (they were the wrong size for my nurf gun) and thought I bet these would make nice feet. I cut off the top 30% of the nurf ball and zip tied it to my arms. They are light and make for much softer landings.
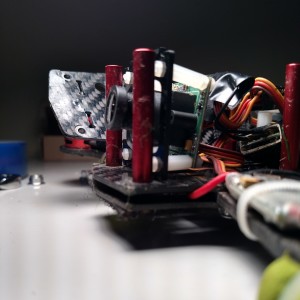
Increased Camera Angle
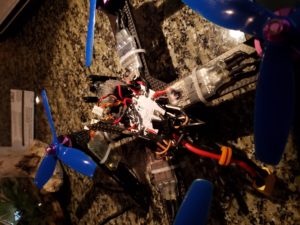
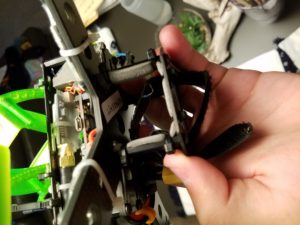
I put longer standoffs on top and shorter standoffs on bottom to increase the camera angle once I started wanting to go faster.
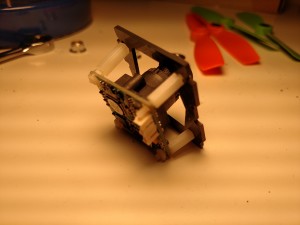
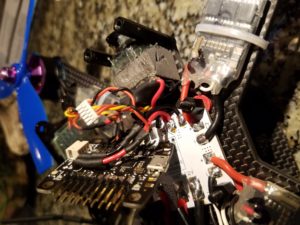
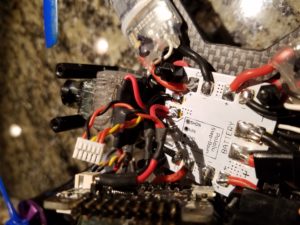
Shortened Wire from ESC to Motors
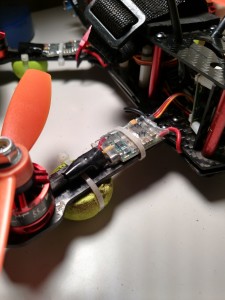
After I had more experience soldering I finally was brave enough to cut the wires on the ESC and Motors and solder them together as RC Model Reviews did in the tutorial. This reduces weight and makes the quad look a lot cleaner.
Fight Controller Software – Cleanflight/Betaflight
https://chrome.google.com/webstore/detail/cleanflight-configurator/enacoimjcgeinfnnnpajinjgmkahmfgb
I switched from Baseflight to Cleanflight and like it better. I feel like Cleanflight has more options and after loading my Naze32 with BetaFlight it flew smoother. Here’s a good tutorial on switching from Baseflight to Cleanflight: https://www.youtube.com/watch?v=ES2T_Svjc_s and here’s the tutorial I used on loading Betaflight on the Naze32 using Cleanflight: https://www.youtube.com/watch?v=YXtB62GAKSA
Taranis and General Set Up Improvements
-Switch for arming/disarming. The set up for this is similar to setting up different flight modes.
-Turned off motor_stop feature. Makes flips easier and less dangerous when you kill the throttle.
-Set up timers on the taranis: https://www.youtube.com/watch?v=cmC0RGopffg
-Set up battery warnings and voltage read out (I put a timer read out on the same switch as well): https://www.youtube.com/watch?v=Q7KpBGDxZQ4
-Set up switches to allow for in-flight tuning: https://www.youtube.com/watch?v=GhPCTRvnOEo
-Tuning in general: https://www.youtube.com/watch?v=5VXMXwzlNLU
